Windows Hello is a two-factor biometric authentication mechanism built into Windows 11, and it is unique to the device on which it is set up. Windows Hello enables users to unlock their devices using facial recognition, fingerprint scanning, or a PIN.
Windows Hello for Business is the enterprise implementation of Windows Hello and enables users to authenticate to an AD DS or Azure AD account, and it allows them to access network resources. Administrators can configure Windows Hello for Business using Group Policy or mobile device management (MDM) policy and use asymmetric (public/private key) or certificate-based authentication.
Windows Hello provides the following benefits:
- Strong passwords can be difficult to remember, and users often reuse them on multiple sites, reducing security. Windows Hello enables them to authenticate using their biometric data.
- Passwords are vulnerable to replay attacks, and server breaches can expose password-based credentials.
- Passwords offer less security because users can inadvertently expose their passwords because of phishing attacks.
- Windows Hello helps protect against credential theft. Because a malicious person must have both the device and the biometric information or PIN, it becomes more difficult to hack the authentication process.
- Windows Hello can be used both in cloud-only and hybrid deployment scenarios.
- Windows Hello signs you into your devices much faster than when using a password.
To implement Windows Hello, your devices must have the appropriate hardware. For example, facial recognition requires using special cameras that see infrared (IR) light. These can be external cameras or cameras incorporated into the device. The cameras can reliably distinguish between a photograph and a living person. For fingerprint recognition, your devices must be equipped with fingerprint readers, which can be external or integrated into laptops or USB keyboards.
Note Legacy Fingerprint Readers
If you have previously experienced poor reliability from legacy fingerprint readers, you should review the current generation of sensors, which offer significantly better reliability and are less error-prone.
After you have installed the necessary hardware devices, you can set up Windows Hello by opening Settings, selecting Accounts, and then, on the Sign-In Options page, under the Ways to sign in heading, reviewing the options for facial or fingerprint recognition. You can still configure a PIN or use a Security key if you do not have Windows Hello–supported hardware.
To configure Windows Hello for facial recognition, follow these steps:
- Open Settings and select Accounts.
- On the Accounts page, select Sign-In Options.
- Under the Ways to sign in heading, select Facial recognition (Windows Hello).
- Click Set up, and when prompted, click Get started.
- Enter your PIN or password to verify your identity.
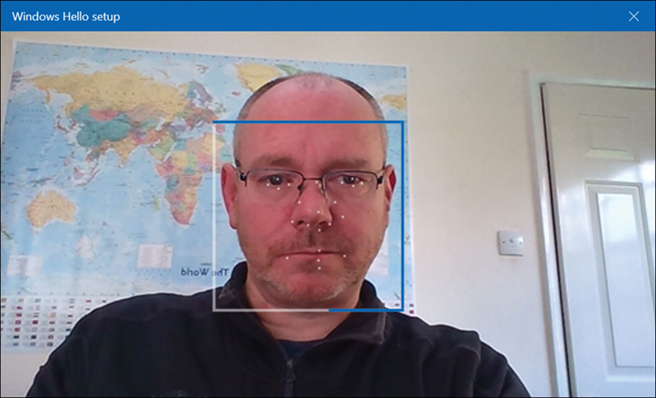
- Allow Windows Hello to capture your facial features, as shown in Figure 2-4.

FIGURE 2-4 Configuring Windows Hello
7. After completion, you are presented with an All Set! Message, indicating that you can close the dialog.
Users can use Windows Hello for a convenient and secure sign-in method tied to the device on which it is set up.
For Enterprises that want to enable Windows Hello, they can configure and manage Windows Hello for Business. Windows Hello for Business uses key-based or certificate-based authentication for users by using Group Policy or mobile device management (MDM) policy or a mixture of both methods.
Need More Review? Windows Hello Biometrics in the Enterprise
To review further details about using Windows Hello in the enterprise, refer to the Microsoft website at https://docs.microsoft.com/windows/access-protection/hello-for-business/hello-biometrics-in-enterprise.
